Getting all the gear you need together for a backpacking or camping trip could turn out to be a tad expensive. However, there are ways around that by choosing to do DIY projects. Not only are these outdoor cooking projects fun, they all work just as well as something you’d buy at your favorite outdoor store. Next time you have a few spare moments, try putting together these awesome DIY projects for cooking in the outdoors:
1. Pocket Grill
A grill that fits in your pocket, that you can make all by yourself? Count us in. Here’s how you do it.
Tools: Materials:
A hacksaw 18mm copper pipe
Cutting pliers 15mm copper pipe (must fit inside the larger one)
Drill and bit 2 Copper tube caps (which fit the larger pipe)
Utility knife About 20 1/16” stainless steel bike spokes
Sandpaper or file (The bigger the grill, the more spokes you’ll need)
Ruler

Step one: Gather all the tools and materials
Step two: Cut both copper pipes to be the same length (about 8 inches)
Step three: Mark holes about an inch apart on the pipes. Then, drill the holes. This is where the spokes go,
Step four: You’ll need as many spokes as you have holes. Count.
Step five: The spokes need to fit inside the pipes. Cut them with the pliers accordingly.
Step six: Cut 2 spokes a little longer than the others so that can bend at a 90 degree angle at the end, and have intact thread at the other. This is to screw them in.
Step seven: Lay the two pipes across from each other, and assemble the grill by putting in the spokes, one by one. Make sure the two ends have the spokes that bend, and screw on nipples.
Step eight: Disassemble! Unscrew the nipples, and the grill will essentially collapse. Put everything inside the larger tube, and place on the copper caps. Then, throw it in your back pocket!

2. Easy Fire Starters
Need fire-starters that are clever, cool, and cheap? Try these DIY ideas:
Idea one: Dip flat, round cotton swabs in wax. Ta da!
Idea two: Take a CARDBOARD empty egg carton, and put in a piece of Match Light Charcoal into each hole. Throw the whole thing into a grill or firepit, and you’re good to go!

Idea three: Use a baby food container, glue sandpaper on the lid. Then, put matches inside. You’ll always have a backup.
3. Convenient Camping
Anything that can make cooking in the outdoors easier is a bonus. Here are some ways to make this task more convenient:
Idea one: Using an old belt with some hooks, loop it around a tree and hang your pots and pans for easy access and drying after washing them.

Idea two: Collect old Tic Tac containers. Put spices in them, and label. Viola!

Idea three: Use a mason jar and throw in pancake mix, or anything else that is a powdered mix. Add eggs, water, whatever else is required, screw in the lid, then shake and pour!
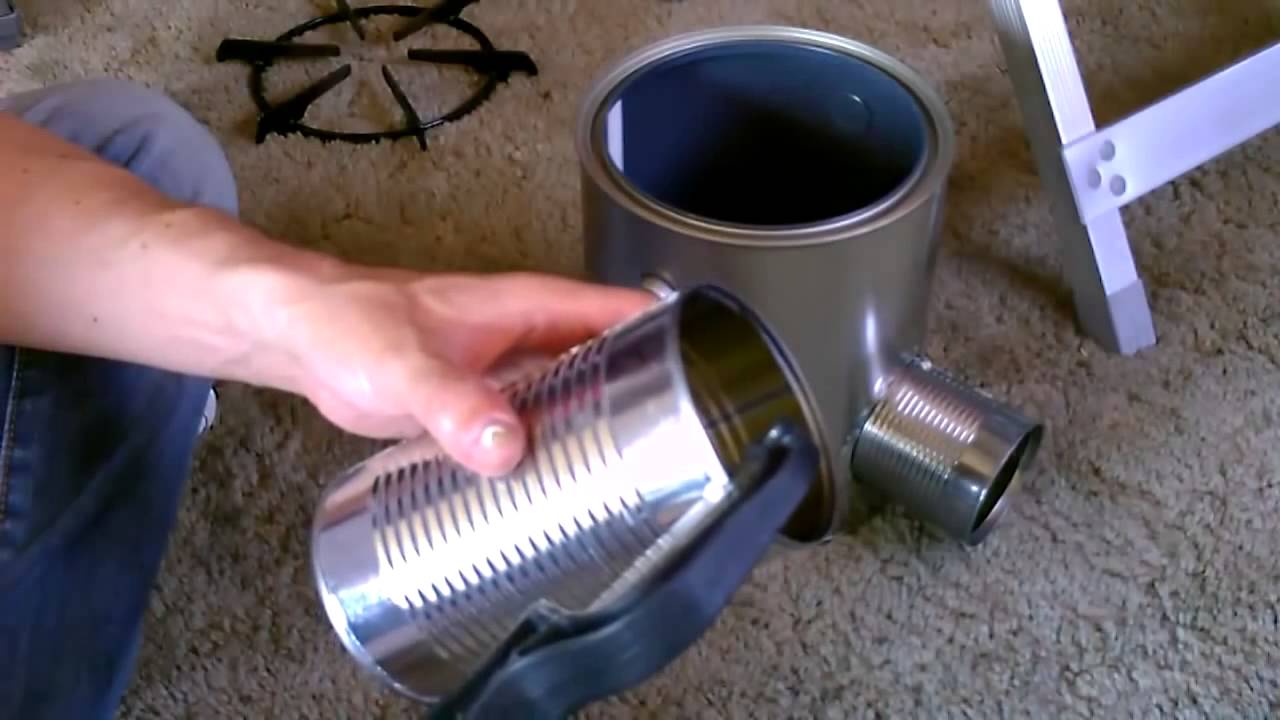
4. Rocket Stove
This DIY rocket stove is an easy way to make a cooking device you can take with you anywhere. This way you can always have something handy on deck, that doesn’t cost a lot of money to make.

Tools: Materials:
Tin snips, or anything that can cut metal #10 can
Permanent marker 2 large 28oz cans
Heavy duty gloves An extra can (of any size, but large is better)
Wire hanger
High heat spray paint (optional)
Insulation
Step one: Use the lid from one of the 28oz cans (CAN A), and trace a circle onto the #10 can using the permanent marker. Do it towards the bottom of the #10 can. Using the tin snips, cut out the circle.
Step two: Using the circle you just cut out from the #10 can, place it on CAN A and trace yet another circle with the permanent marker. Cut with tin snips.
Step three: Place CAN A inside the #10 can, with both circles lined up.
Step four: Take the second 28oz can (CAN B), and cut off the rim with tin snips. Then, cut little tabs about an inch and a half deep, all around the perimeter (where you just cut the rim). These tabs will help CAN B fit securely inside the others.
Step five: Shove CAN B through the circle in the #10 can and into the circle of CAN A. All three cans should be connected now.
Step six: On top of the lid of the #10, trace another circle using either CAN A or CAN B. Cut out the circle.
Step seven: Insulate the inside of the #10 can well, around the perimeter of CAN A.
Step eight: Cut tabs into the top of the #10 can.
Step nine: Take the lid of the #10 can (which now has a circle cut out of it), and hammer it into the stove, on top of the insulation. Put down 4 of the tabs to lock the lid in place. You should be able to see straight down through CAN A.
Step ten: Using the extra small can, cut a rectangular piece of metal with flaps. Cut an inch deep into each parallel side of CAN B, and slide this metal piece into place. It should look like you have a shelf right in the middle of CAN B. This is where you place the twigs on top of to start your fire.
Step eleven: Using the wire hanger, make a handle at the top. Your pot or pan should be able to sit securely on top of the unfolded tabs of the #10 can.
Step twelve (optional): Spray paint.
These DIY projects are fun, easy, and will save you a lot on your outdoor cooking gear!